
Saturday, June 28, 2014
Companion Planting: Herbs Instead of Insecticides
Using herbs and flowers in this way can keep your garden "green" and prevent tears when you find your prized tomato plant cut off at the root by some nasty bug!
Petunias, marigolds and geraniums can be planted in a border around the garden or trees. If you want the benefit of catnip without digging it out of your garden for years to come, put in a large clay pot and place nearby. For other pest preventers, thoughtful interplanting of vegetables can help with the process.
Underlined items can be found at Beier's Greenhouse.
Ants: Pennyroyal, spearmint, southernwood, tansy
Aphids: Garlic, chives and other onions, coriander, anise, nasturtium and petunia around fruit trees
Borer: garlic, onion, tansy
Cabbage moth: mint, hyssop, rosemary, southernwood, thyme, sage, celery, catnip, nasturtium
Colorado potato beetle: green beans, horseradish, dead nettle, flax, catnip, coriander, tansy, nasturtium
Cucumber beetle: tansy, radish
Cutworm: tansy
Flea beetle: wormwood, mint, catnip, interplant crops with tomato
Japanese beetle: garlic, larkspur, tansy, rue, white geranium
Leafhopper: petunia, geranium
Mexican bean beetle: marigold, potato, rosemary, savory, petunia
Mites: garlic, onion, chives
Nematodes: marigold, salvia, dahlia, calendula, asparagus
Rose chafer: geranium, petunia, onion
Slug: rosemary, wormwood
Squash bug: tansy, nasturtium, catnip
Tomato hornworm: borage, marigold, opal basil
Whitefly: nasturtium, marigold
Photo Corner with Janna Salmela Photography: Dreary Day Session Options

This spring I took a high school senior
to Beier's Greenhouse because it was cold and there wasn't any green in sight.
Remember how miserable our winter & spring was? My client was thrilled with
her colorful pictures and it felt so good to be in the warm, moist air!
Some things to remember:
- Call the owner to see if you can shoot in their greenhouse (and don't assume that it's free).
- Be courteous to the staff and customers, and always put back anything that you might have to move.
- Say thank you with social media shout-outs and promoting their business (in person and online).
www.jannasalmelaphotography.com
Hardy Mums: Garden Gems
Hardy Chrysanthemums, or Garden Mums, are popular plants that
have been used in the gardens of China since before 550B.C.Their blooms brighten
garden beds and borders from early August through November with blooms that often
last for many weeks.Some varieties begin blooming earlier than others. Mums come
in a wide assortment of colors including white, many shades of yellow, pink, lavender,
red and bronze.
Today,Mums are a large part of the fall harvest season and are
a great way to brighten and bring color to any spot in the garden. Mums are
also great for use in containers, window boxes and around front entryways.
How to plant and
enjoy these garden treasures
·
Select a sunny, well-drained spot in the garden
or choose an appropriate container.
·
If planting in the ground, enrich the soil by
mixing in a generous quantity of compost or peat moss, a cup of bone meal and
lime (if needed, mums like a pH of 6.2-7.0). Work it all into the soil to a depth
of 8 – 12 ½”. In window boxes or containers, use a good potting mix such as Dr.
Earth’s Premium.
·
Plant mums no deeper than they were in their
container. If the root mass is dense, gently tease apart the outer roots so
they can more readily grow into the new soil.
·
Never let newly planted mums in bloom or bud dry
out.
Pruning (Pinching) and
Deadheading
To keep plants dense and for maximum flower production, mums
should be pinched occasionally. Pinching is a form of pruning used to remove
the end or terminal buds.
Just place your thumb and index finger below a terminal bus
and squeeze until the bud is removed. Do this all over the top and sides of the
plant. Start when plants are 4-6” all, repeating every 4-6 weeks or as needed
until around July 4th. Flower buds will begin to form shortly
thereafter so no more pinching is needed.
For larger individual flowers, when the flower buds form, selectively
remove all stems except 4 or 5 of the strongest ones. Energy will be redirected
to these buds, resulting in fewer but larger flowers per plant.
After Blooming
After the flowers fade and the foliage dies back (mid to
late-December) cut your mums down to the grown and mark or label the location
of each individual plant.
Apply a 3-4” layer of organic mulch (shredded cedar, pine
bark, wood chips, ect) to protect the roots during the winter and to prevent
them from heaving in the freezing and thawing of the earth.
In the Spring
When the snow has melted, remove the mulch from the base of
each plant to allow the sun to warm the soil and trigger new growth. Fertilize
with a good granular fertilizer like 5-10-5. Continue to fertilize every 4-6
weeks through September.
Making New Plants
For best appearance and productivity mums should be dug and
divided every 2 or 3 years. This can be done in late-March or April when new
growth is 4 – 6 ½” high.
Dig up the mum clumps with a form or shovel. Separate the
shoots from the mother plant with a sharp knife. Each shoot should include 1 –
2 ½” of roots. Plant the new plants following instructions outlined above;
discard the old clump. Pinch the plants when they become established.
Mums are also easily propagated (rooted) from stem cuttings
taken in the spring from new, vigorous growth.
Saturday, June 14, 2014
Dicentra 'Luxuriant'
Dicentra (Bleeding Hearts) is an old time favorite for the shade garden characterized by dangling heart-
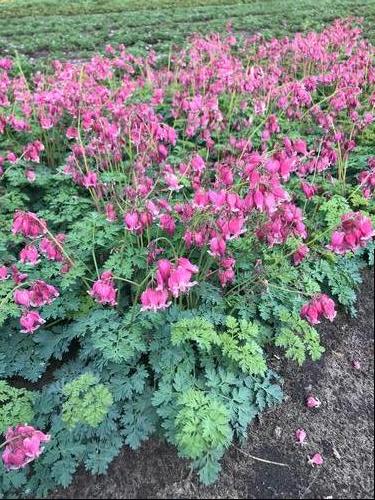
Dicentra ‘Luxuriant’ features deeply-cut, fern-like, grayish-green foliage which persists throught the growing season and cherry red, nodding, heart-shaped flowers carried above the foliage on long, leafless, leaning stems. This variety typically grows to 15” tall. Blooming begins in late spring. With cool weather, this variety will continue to bloom or re-bloom. ‘Luxuriant’ is deer resistant, shade tolerant, and attracts hummingbirds making it a great addition to any garden.
Thursday, June 5, 2014
Photo Corner with Janna Salmela Photography: Flowering Trees
Flowering trees make beautiful but
tricky backdrops!
We photographers start drooling as soon as the

Here's some tips to make your spring
flowering tree session a success.
1. Find a tree with branches that
hang low to the ground.
2. Ideally, we'd like to see sun
on the branches in the late afternoon/early evening.
3. Contact your photographer in
March or April and let them know you are interested in a session (family,
engagement, High School Senior, etc). Find out if they have locations
they use already and let them know that you've found one too.
4. Work out a plan with your
photographer. I would give you a list of dates that work for me over a
period of a few weeks so that we can be very flexible. AT THE FIRST SIGN
OF BUDS, CALL!
5. Evening light is the absolute
best light for beautiful images. I like to start between 6:00 and 7:00pm.
With a little bit of work, you can have
stunning and unique photos that capture the essence of spring.
Janna
Salmela Photography
Tree & Shrub Care Guide
Watering: Newly planted trees and shrubs
will require you to water them periodically for another 2 to 3 years. In general, most trees will need to be
watered weekly the first years, every two weeks the second year, and every
three weeks the third year. As with at
planting, place a hose at the base of the plant and turn the water on at a
trickle. Each tree should be watered in
this manner for approximately 1 to 2 hours. It is essential to water slowly enough to
allow the water to penetrate the soil without running off. Be sure to water your tree or shrub before the
first hard frost. This may help
eliminate winter kill on the roots.
Fertilizing: You should fertilize your tree
with granular fertilizers such as 10-10-10 at a rate of 1 cup per 2 caliper
inches of trunk (diameter of trunk one foot above the ground). Ensure
that the fertilizer has at least 50% slow release Nitrogen. Spread fertilizer around tree at the drip line
or at the outer edge of the root ball. Fertilize in early April-June. Water well after fertilizing.
Mulching: Wood and other organic mulches
will decompose over time and it is essential to replenish the mulch ever 1 to 3
years. Mulch provides insulation for the
roots, aides in holding moisture, helps prevent weed germination, and provides
nutrition as it decomposes.
Insect, Disease
and Pest Control: It is recommended that you monitor your plants for insect and disease
pressures. A few insects or a little
powdery mildew will not decimate you tree, however high numbers of certain pest
can severely stress and harm your tree.
Once you have determined or had a professional determine if the pest is
detrimental, you can have it treated professionally. Or you may pick up the right product for the
right pest from our Garden Center.
To protect your tree or shrub from mice and moles, put
wire mesh around the trunk and into the ground about two inches. Have the mesh wire go approximately two feet
up the tree. Put tree wrap around the base and up to the first branch before
winter. Be sure to remove the tree wrap in the spring.
Insect, Disease and Pest
Control for Apple Trees: When buds first show green but before leaves are ½” long, spray with Dormant Oil Volick Spray. This controls
mites, scales, and aphids. When flowers
first show pink tips but before blooming, spray with an all purpose spray. Home and Orchid Spray. This controls
apple scab. After petals fall, spray
with the same all-purpose fruit spray.
Pruning: Your Beier’s Greenhouse tree
is a nursery cultivated tree and should already have a desired shape at
installation. However, you will always
need to be on the lookout for crossing branches that rub on each other. It is also a good idea to thin out the tree
ever 3 to 5 years. This invigorates new
growth and fullness. Be sure not to cut out the “leader” of the tree. Prune
shade and apple trees in late March or early April. Prune evergreens in late June through
July. Remembering the three “D’s”- dead,
dying or diseased; these are the branches to look for and prune out anytime.
Pollination for Apple Trees: Apple trees generally are not
self-fertile. Two varieties are needed
to be productive. Two varieties should be used in each apple tree planting to
serve as a source of pollen for the other variety. Cross-pollination is possible
only when varieties bloom approximately at the same time. Length of bloom is usually 7 to 15 days.
Early bloomers should be planted with early to mid-season bloomers and late
bloomers should be planted with mid-season to late bloomers.
Subscribe to:
Posts (Atom)